Multitenancy on NAV2015 Image on Microsoft Azure

When we speak about NAV on Azure, we expect Multitenancy as main strength. This is because, we expect an easy repeatability. Now, I will explain how to achieve this goal using NAV 2015 image deployed on Microsoft Azure.

We have excellent tolls, but we also have some rules. First, if you already run “O365 Integration pack” and “ClickOnce Deployment pack” scripts, unfortunately you cannot use this tools. You will get message similar as on following picture:

Multi0

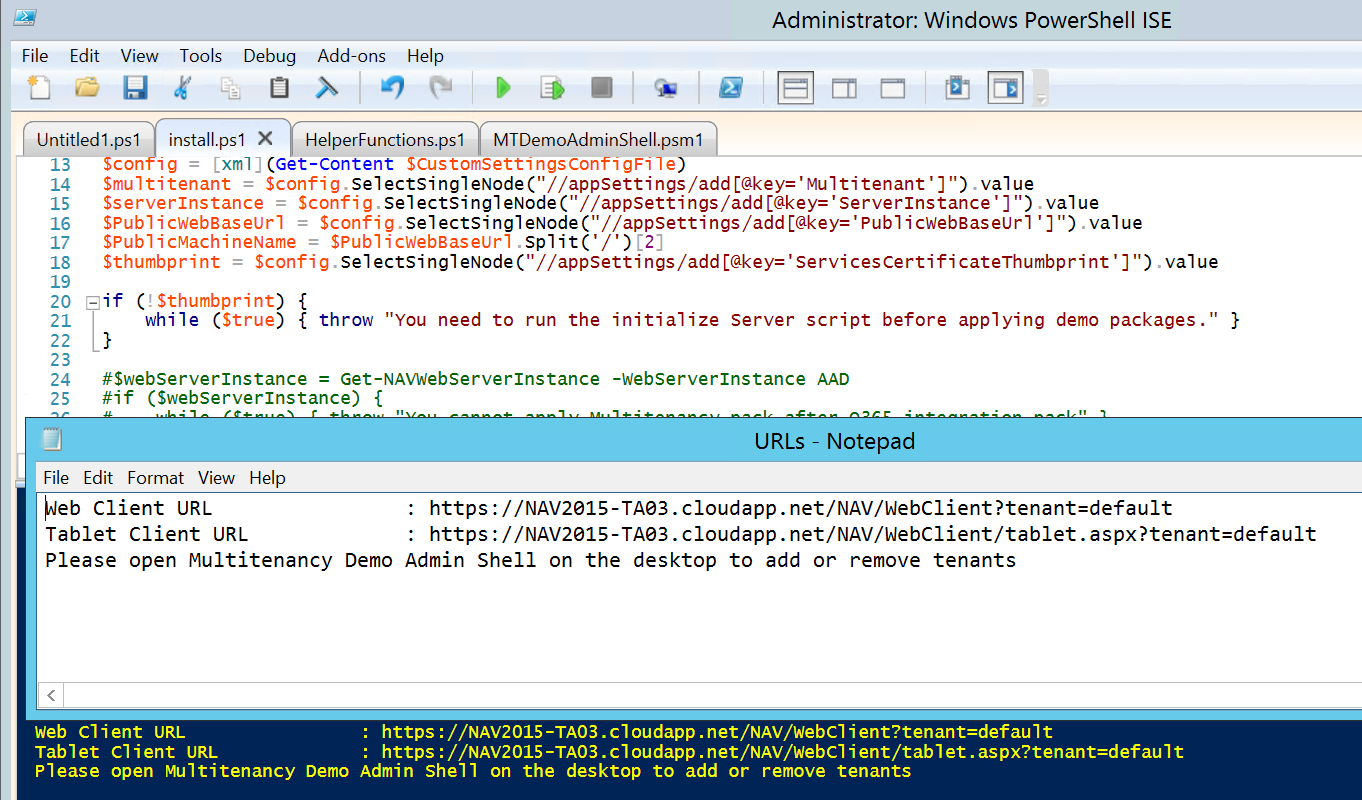
You need to have a clean image deployment with running only “Initialize the VM pack” (must run it). Then, you need to run install.ps1 file from C:\DEMO\Multitenancy folder. You can find it, when you click on Enable Repeatability from NAV on Azure Welcome Screen. You can run this PowerShell file using PowerShell ISE.

When you open this script, you have to replace “vmadmin” in path with your user name on all places you can find. You can see one of the examples on following picture:

Multi0-1

You could also rename tenant ID, if you want it. It has name “Default”, by default.

After that, you can save and run your script. When script is finished, you will get URLs file with your new links with tenants.

Multi1

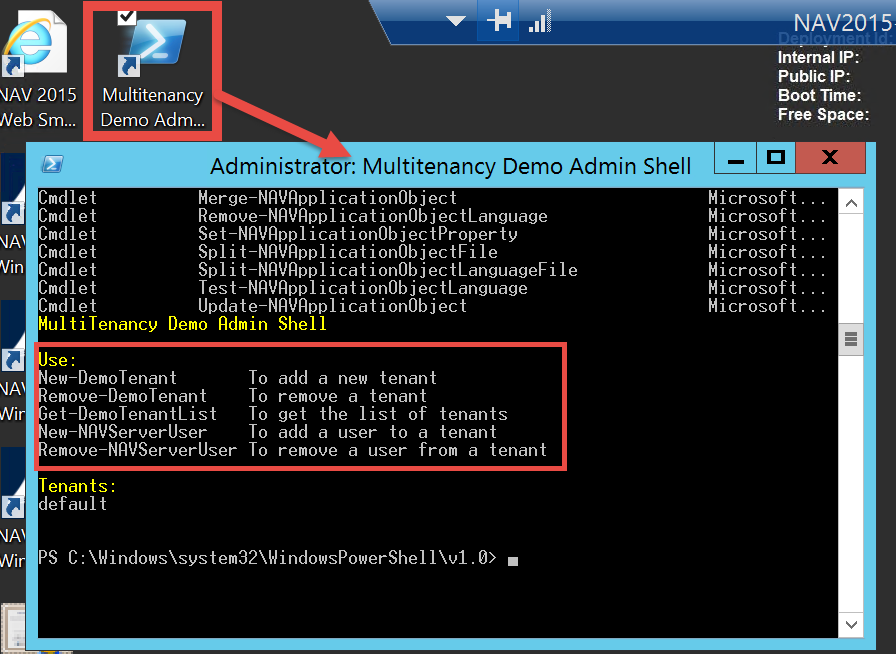
Now, you can use these new links to run your NAV 2015 with tenant. If you want to add new tenant or remove existed, you can do it running Multitenancy Demo Admin Shell from your VM desktop. You can also use it tool to add users to tenant or remove existed from tenant.

Multi2

Advertisement

Using ClickOnce to create Windows Client for NAV2015 Image on Microsoft Azure

The last time when I wrote about new NAV 2015 image on Microsoft Azure, I showed you how to create VM and how to change credential to NavUserPassword for really cloud using. After running the Initialize the Virtual Machine, you got possibility to run all NAV clients from VM and Web Client from your computer. Of course, for this you had to add new Endpoint on Microsoft Azure Portal: HTTPS, with 443 as port numbers. But, I suppose you want to use NAV with Windows Client from your PC. For this usage, we again got an excellent tool on Welcome screen. You need to click on Install Click Once deployment of the Windows Client link and you will find PowerShell script in DEMO folder. You need to run your PowerShell ISE as Administrator and open this script install.ps1. Now, you only need to run this PS script. After few minutes, system will show you all links, and on the end link for ClickOnce. ClickOnce1

Now, you have to add new Endpoints on your Microsoft Azure Portal:

  • HTTP, with 80 as port numbers for ClickOnce install (this port is configured in previous script)
  • Windows Client, with 7046 for NAV Window Client running

ClickOnce0

When you finish with Endpoints, you have to use your ClickOnce link from URLs file on your Internet Explorer. System will open ClickOnce Online Installation page. You need to run Install and wait. ClickOnce2

After installation is finished, you only need to fill your credentials and run your Microsoft Dynamics NAV 2015 Windows Client on Microsoft Azure.

ClickOnce3

That’s all about easy using script for ClickOnce Windows Client installation. But, I will show you something more about it few daysd

New Cumulative Update 4 for NAV 2015 has been released

Cumulative Update 4 for Microsoft Dynamics NAV 2015 has been released today. It includes almost all application (Administration, Client, Finance, FA, Inventory, Jobs, Manufacturing, Purchase, Sales, Server, Service and Warehouse) and platform hotfixes and regulatory features that have been for Microsoft Dynamics NAV 2015. It also has a lot hotfixes for following localisations: Australia, Spanish, Italy, France, North America, Netherlands, Russia, Sweden, United Kingdom.

You can download Cumulative Update 4 for Microsoft Dynamics NAV 2015 from here. This CU is named as Build 39663.