In-Client Designer in Dynamics NAV – June Update

To continue yesterday’s article about In-client Designer in Dynamics NAV as I promised. If you want to check these features from this year June update, you need to deploy Azure virtual machine from the following link: http://aka.ms/navdeveloperpreview.

One of the biggest feature is possibility to customize Role Center. Now, we can reposition or hide Cue  or Cue group on Role Center. And not only on Role Center, we can also do it on any page where we have cues.

InDesign4

What is more new in In-client designer? When we want to finish our customization, system will ask us for our Extension Name and Publisher as well.

InDesign5

When we save it, system will download it as a zipped VS Code:

InDesign6

Of course, we have a lot more features and improvements, but they are mostly related to VS Code. In some new articles, I’ll show more about it.

Advertisement

In-Client Designer in Dynamics NAV

Recently, Microsoft published new Developer Preview for the next NAV version. If you try to find it on Azure portal as one of the NAV virtual machines, you will find “Dynamics NAV ‘Tenerife’ Development Preview”.

When you install run NAV after deployment, in the first moment you will not see ‘Design Mode’ icon. To get it, you need to run ‘Install New Developer Experience’ PowerShell script. After that you can try In-client designer. Now let’s see some of the features. This tool can be used for page design.

Currently, we can work only with Fields and not with Actions, Parts and Pages. If we run design for the list page, we can change an order on columns, remove some of fields, add them and set freeze pane.

InClient1

The same situation is if we want to make some customization on card page; we can do everything the same as on list, except adding freeze pane 😊. But this is with standard fields on pages. On the other side, we can add fields on card part pages. We can notice that we have context oriented fields for part pages. And also, we have some controls, as we can only drop media fields onto card part pages and we cannot drop a field under a repeater control, because this is not the design that list pages were intended for.

InClient2.PNG

And finally, we can add or remove some parts on role center. When we decide to finish with customizations, we just need to click on ‘Stop’ and system will ask us what to do with ours work. System will offer to save the changes to the tenant for all users, or to save the changes to a VS Code package file that we can work on later in VS Code.

InClient3

On the first sight, that is all, but if you create Azure VM using http://aka.ms/navdeveloperpreview URL, you can get some newer features. More about this in the next post.

NAV 2017 Demo Image on Azure

Dynamics NAV 2017 has been published three days ago and we already got NAV 2017 Demo Image on Azure. This is very short period and this is amazing. All people who want to test NAV 2017 don’t need to install it on its computers, but they can use it on Azure. Great job.

Currently, we can create demo image only if we use old Azure Portal. We just need to start with new virtual machine from gallery image and choose Dynamics NAV 2017. We need to configure a few fields and wait a few minutes. And yes, we can use NAV 2017 with a lot of interesting tools.

NAV2017VM1.jpg

But be careful; if you prefer new Azure Portal, you cannot do it. It is still not possible, but I expect it will be done in few following days. Now, just go to the old portal and finish procedure.

NAV2017VM2.jpg

Of course, you can see this VM using new portal as classic VM, but you cannot create it. If you need this VM only for testing, my recommendation is to use D1 or A2 sizes. They are good enough for all tests and you will not spend a lot of your money for this purpose.

When you create VM and run it, you can start with initializing of NAV. On my first sight, there are the same PS scripts as well as on the older NAV demo images. I will test all of them and if I find something new, I’ll publish this.

VMs in New Azure Portal

I’ve already wrote about new Microsoft Azure Portal code named Ibiza. When you look this new portal, one of the first news in that now we have two menus for virtual machines:

  • Virtual Machines
  • Virtual Machines (classic)

AzureVMandVMclassic.png

You will see that all virtual machines you already created using old Azure Portal are placed in Virtual Machines (classic). I want to give you a small descriptions about difference between these two options.

The new Azure Resource Manager with a new API doesn’t uses resources as the old API. Because of that, the classic API stack is still operational, but you’ll see those resources showed up as (classic). You have not a reason to convert classic VM to the new VM. You just need to know that you cannot include classic VM in a virtual network deployed with Resource Manager and they don’t have to be included in a virtual network (unless new VMs must be included).

But if you want to migrate classic VM to the newer model, first you have to be sure you can afford a downtime for your VM. If you can afford it, than you can do it using ASM2ARM PowerShell script. You can find all details here.

I hope, I helped you. I have some more information about it and I’ll prepare a real interesting example soon.

Development Environment on Azure SQL

After my session on NAV TechDays about deployment of NAV 2016 on Azure SQL Server, I got a lot of questions about using Development Environment in this situation.

Using Development Environment can be done absolutely normal. If you want to use DE from your local computer, first you have to add your IP address to Azure SQL firewall (SQL Databases > Servers > choose server > Configure). You can do it to allow connection between your computer and Azure SQL server.

DE01

After that, open Development Environment and type your full Azure SQL server name to Server Name (xxxxx.database.windows.net), choose Database Server Authentication, your username and password and on the end normally choose your database.

DE02

You can work with design, but if you want to open table for example, you have to make some additional configurations. Before it, you have to make connection between your local NAV Windows Client and Azure VM. You need to use certificate and encryption key. After you configure them, everything will be OK.

If you want to use Development Environment directly on Azure VM, you just need to open DE and login to Azure SQL server (I already described), nothing else. In this situation you can work what you want.

DE00

You can see it on previous picture. Database is opened from Azure SQL and you can do everything as you used to.

How to Deploy NAV 2015 on Azure

First of all, I will make small introduction for all people who don’t know what a Microsoft Azure is. With simple words, Microsoft Azure is Microsoft cloud computing and services platform with physical infrastructure all around the world. On this cloud platform, there is a virtual machines, SQL databases, storages, with Visual Studio online, and many other things, as one “global operating system”. Microsoft Azure also can includes Microsoft Dynamics NAV services.

I will explain some basic deployment topologies that are supported. We can choose topology with one or two virtual machines.

If we choose to deploy Microsoft Dynamics NAV on a single virtual machine, the Microsoft Dynamics NAV Web Server components, Microsoft Dynamics NAV Server, SQL Server, and Microsoft Dynamics NAV database components will be installed on the same virtual machine.

#Azure1

If we choose to deploy Microsoft Dynamics NAV on a two virtual machines, the Microsoft Dynamics NAV Web Server components and Microsoft Dynamics NAV Server will be installed on one virtual machine, and the SQL Server and Microsoft Dynamics NAV database components will be installed on another virtual machine.

#Azure2

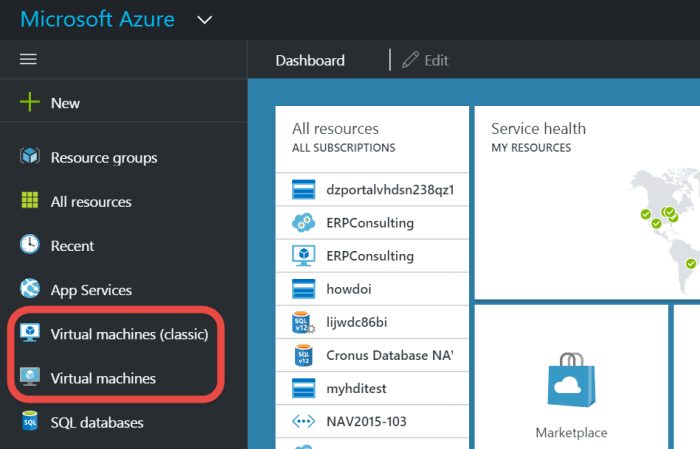
In the first scenario, this virtual machine represents a single cloud service on Microsoft Azure, and in second scenario each virtual machine represents a cloud service on Microsoft Azure. In both of these topologies, users can access Microsoft Dynamics NAV data by using the Windows client (from a ClickOnce site or without it), the Web or Tablet client and OData and SOAP web services.

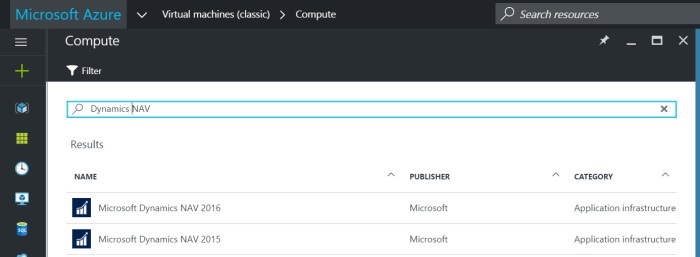
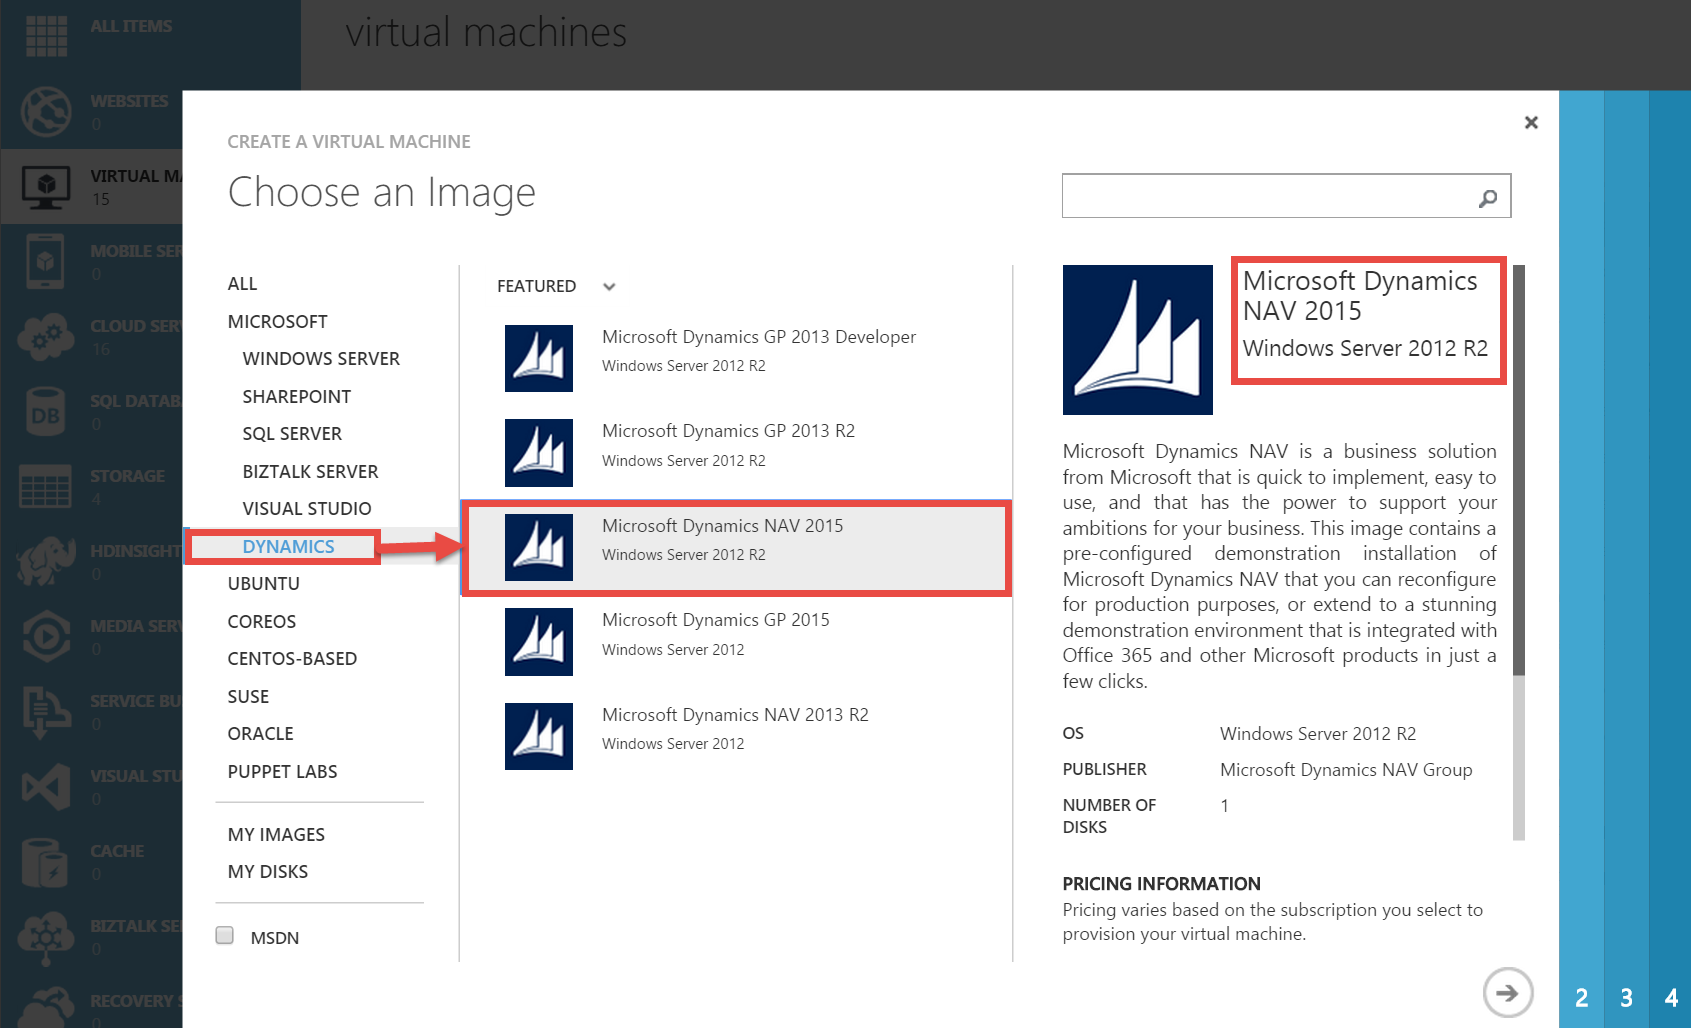
If we want to deploy Microsoft Dynamics NAV 2015 on Microsoft Azure, we can use NAV Provisioning Tools for Microsoft Azure that support the automated deployment of Microsoft Dynamics NAV 2015 on Microsoft Azure virtual machines, using both of topologies. You can find NAV Provisioning Tools as Windows PowerShell scripts on Microsoft Dynamics NAV 2015 installation DVD on \\NAV2015DVD\WindowsPowerShellScripts\Cloud\HowTo\

#Azure3

You can find few files in this folder. First of all, you must configure Set-PartnerSettings file and after that you can run one of the following PowerShell scripts Example-1VM (deployment on 1 VP) or Example-2VM (deployment on 2 VMs).

If you want to deploy Microsoft Dynamics NAV 2015 on only one VM (usually for test or demo environment), you can find all details on How Do I video: https://msdn.microsoft.com/en-us/dynamics/nav/mt147285

Also, if you want to deploy Microsoft Dynamics NAV 2015 on two VMs (usually for production environment), you can find all details on How Do I video: https://msdn.microsoft.com/en-us/dynamics/nav/mt147286

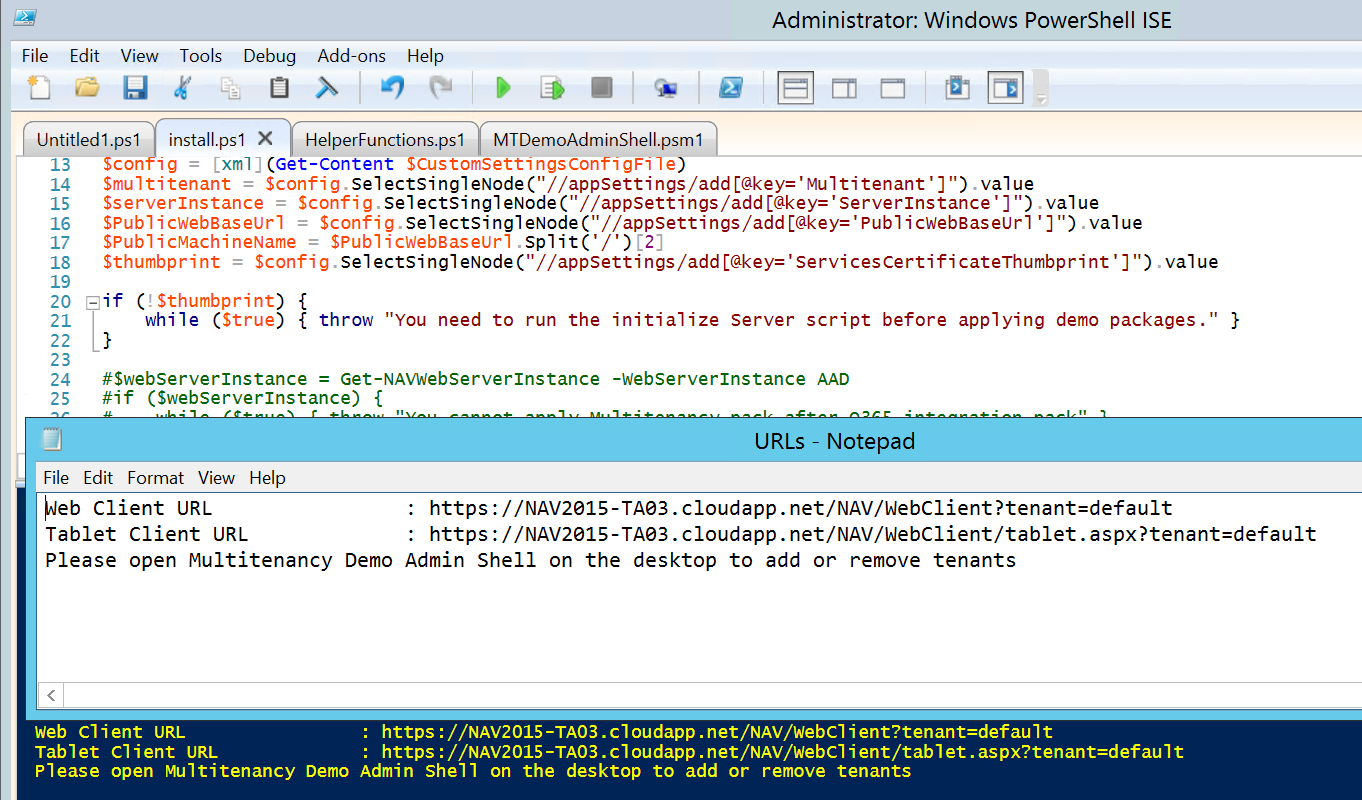
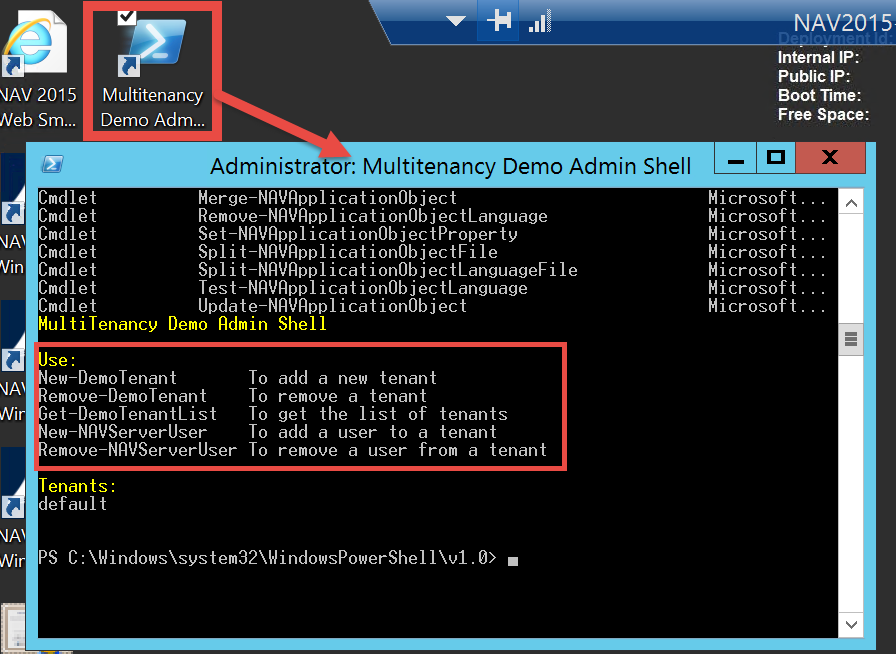
In some other articles, I will describe all steps how to make Multitenancy environment or how to use production database, license, language etc.

Multitenancy on NAV2015 Image on Microsoft Azure

When we speak about NAV on Azure, we expect Multitenancy as main strength. This is because, we expect an easy repeatability. Now, I will explain how to achieve this goal using NAV 2015 image deployed on Microsoft Azure.

We have excellent tolls, but we also have some rules. First, if you already run “O365 Integration pack” and “ClickOnce Deployment pack” scripts, unfortunately you cannot use this tools. You will get message similar as on following picture:

Multi0

You need to have a clean image deployment with running only “Initialize the VM pack” (must run it). Then, you need to run install.ps1 file from C:\DEMO\Multitenancy folder. You can find it, when you click on Enable Repeatability from NAV on Azure Welcome Screen. You can run this PowerShell file using PowerShell ISE.

When you open this script, you have to replace “vmadmin” in path with your user name on all places you can find. You can see one of the examples on following picture:

Multi0-1

You could also rename tenant ID, if you want it. It has name “Default”, by default.

After that, you can save and run your script. When script is finished, you will get URLs file with your new links with tenants.

Multi1

Now, you can use these new links to run your NAV 2015 with tenant. If you want to add new tenant or remove existed, you can do it running Multitenancy Demo Admin Shell from your VM desktop. You can also use it tool to add users to tenant or remove existed from tenant.

Multi2

Using ClickOnce to create Windows Client for NAV2015 Image on Microsoft Azure

The last time when I wrote about new NAV 2015 image on Microsoft Azure, I showed you how to create VM and how to change credential to NavUserPassword for really cloud using. After running the Initialize the Virtual Machine, you got possibility to run all NAV clients from VM and Web Client from your computer. Of course, for this you had to add new Endpoint on Microsoft Azure Portal: HTTPS, with 443 as port numbers. But, I suppose you want to use NAV with Windows Client from your PC. For this usage, we again got an excellent tool on Welcome screen. You need to click on Install Click Once deployment of the Windows Client link and you will find PowerShell script in DEMO folder. You need to run your PowerShell ISE as Administrator and open this script install.ps1. Now, you only need to run this PS script. After few minutes, system will show you all links, and on the end link for ClickOnce. ClickOnce1

Now, you have to add new Endpoints on your Microsoft Azure Portal:

  • HTTP, with 80 as port numbers for ClickOnce install (this port is configured in previous script)
  • Windows Client, with 7046 for NAV Window Client running

ClickOnce0

When you finish with Endpoints, you have to use your ClickOnce link from URLs file on your Internet Explorer. System will open ClickOnce Online Installation page. You need to run Install and wait. ClickOnce2

After installation is finished, you only need to fill your credentials and run your Microsoft Dynamics NAV 2015 Windows Client on Microsoft Azure.

ClickOnce3

That’s all about easy using script for ClickOnce Windows Client installation. But, I will show you something more about it few daysd

New NAV2015 Image on Microsoft Azure

Finally, we got a new NAV release as image on Microsoft Azure Gallery. This is Microsoft Dynamics NAV 2015 CU3. I expected it earlier, because GP 2015 has already existed. But, OK this is not so late. blog-1 Now, all of you who want to test Microsoft Dynamics NAV 2015, can do it on Microsoft Azure VM. And, I am really happy, because it is with the last CU with great features. You can install it easy as you only need to follow instructions and wait few minutes for deploying. You can use Connect icon to make connection with new Azure VM. When you are signed on VM, you have all necessary links and you can run new NAV. You can run Windows, Web and Tablet clients or Development Environment. You also can run Administration and Development Shells. But I am little disappointed, because again as for NAV2013R2, we have configured Windows credential type, not NavUserPassword. With Windows credential type, you can use this NAV only on this VM. You cannot have really Azure experience. You also have only two endpoints, but you can add additional. blog-2 To make Azure experience with logging from your computer, you have to change credential type with new tools (I will post about it). But regardless of it, it image has excellent tools. You can find all important location for NAV on VM easy and you can add your language, as well and do other great things. Some of features are not installed by default, but you can easy find installation DVD (using link on home page) and finish it if you need. You also can find a lot of cool demos. In any case, thanks to Microsoft for this image. I will have a lot of information for few days, after I make a few demos.