This will be slightly different from regular blog posts, which you have gotten used to seeing and reading on this blog. This series of posts will be about how I have started and how I’m leading one Microsoft Business Application User Group in Serbia.
Regular blog posts about Microsoft Business Applications will continue to be published regularly. But let’s try to have something new as I have created one UG, and maybe somebody is doing the same at the moment, so this blog post serial will be some tips and tricks on starting and leading UG.
#1 Beginning
Like most things in life and business, you must start with an idea. My idea was to form a User Group focused on Microsoft Business Applications. Business Apps are my focus in my day-to-day job, and all my community work is also focused on Microsoft Business Applications. So, when I realized that in my county MS Business Apps don’t have any active User Groups where people with the same interest can getter and speak and share knowledge. I started to think about forming one.
With an idea, we come to the first and most important part of forming a User Group. You can’t do everything alone, so you need at least one Co-Lead. In my case, this was easy because I immediately asked my recent co-speaker on some events and my friend Nikola Pancic if he would be interested in starting a User Group with me. He accepted the idea.
As advice, if you don’t know somebody who shares the same enthusiasm as you, do search well because there is always a lot of work with User Group, especially in the beginning. Better slow down a little bit until you find someone, then rush with everything alone.
This leads us to the second important part of the beginning of founding your User Group. Think about the name. You have to think of an interesting name that can be connected to the main focus of your User Group and also be different from others. With a good name, you will be recognizable, and also, it is important because everybody who starts with User Group plans to stay with that group for some time, and the name will always be there.
When you have the team and name, you can continue to the third part. Contact your local Microsoft for support. Depending on how big your country and community this could be easy, or if you are from a big country, it could be much more complex. But with support and approval from Microsoft, you are on an excellent path to organizing your first meetup.
In our case, we connected with leaders of other User Groups, who introduced us to the Microsoft team. Then, we shared our idea, which was a good fit for Microsoft Community in Serbia, so support from Microsoft has come easily and fast. It will help you in the future, and of course, If you are starting a Microsoft User Group it is nice to inform them and ask for approval. But I know that in some cases, this will be challenging but do it.
After getting support from Microsoft, we are getting to the part where we must work on the design a bit. Create your logo. This step is important same as a name. The logo will follow you for a long time. Take your time and think about it. There are a lot of free online design tools, so you can use them, but try to create and create many different options and then vote for the best one. In the voting part, ask your friends and family because this is just the part where you create something that has to look nice.
After the logo, we are still on the design side. I recommend creating a PowerPoint template. It is not time-consuming, and there are a lot of tutorials and documentation on how it should be done. This was the first time I was working with PowerPoint templates, and it took me around an hour and a half to create a PowerPoint template.
Before our last step, there is one more thing to do. Create an email address. We wanted to avoid paying anything in the beginning. So, we have created a free Outlook account and are still using it. It is easy and fast. But it is important for our next step.
And now, for the first post about How I have created a User Group, I will end with the last step, which you have to do in this process, which is important. Create Social Media Groups. And when I say create social media groups, I mean to make them all.
At this moment, we have the following:
Twitter
LinkedIn
Facebook
Instagram
Meetup
Social media are important for the future because you will attract users to come to your events and to see all the important things about your group.
With these steps, you have successfully created a Microsoft User Group, and you can be proud of yourself, as we are. For the next post, you will see how to organize your first meetup, and I will try to cover all things which were important to us and all those things which made our first event good.
Now, when chatbots are becoming a more and more popular way of communicating with customers, all users would like to do more via chatbots. As Microsoft’s response to tools that can make chatbots, there is Power Virtual Agents, and the real power of Power Virtual Agent (PVA) is enormous.
But as business application specialists, we always try to think about how to connect it to some of our Business Applications. This time we plan to connect PVA to Business Central (BC). More precisely, we want to create New Sales Order from PVA and directly in BC.
How we can achieve that, and not to say it is easy, but it is not so complicated. In a concise explanation, we will create PVA with typical questions, and then we will ask some specific questions to our users so that they can give us order-specific data. After collecting data, we will use Power Automate to connect all.
But let’s stop talking hypothetically and start creating our PVA connected to BC.
The critical thing to mention is that I will not explain how to create PVA nor suggest which questions to use to trigger it and which flow you will make. I will focus only on the essential steps you must implement to create a Sales Order in BC using PVA. You can start as you like and do it in the best possible way so that it fulfills all of your requirements.
So, let’s start.
First, you will have to get three essential pieces of information from your PVA users:
Account/Customer No.
Item No.
Quantity of Item which customer wants to buy
You can work with Item Name and Customer Name, but be aware that this can make your process more complicated because we have a few things to take into consideration before using this approach:
Human error
Similar names
Many more questions for users
Many more variables to consider
Etc.
If you want to try this approach, consider this problem, and you can do it. The process is similar, only with some more steps.
But with our approach, let’s create three questions in Power Virtual Agent and define Variables for them:
Choose Add Node
Choose Ask a Question
In Question, define:
What is your company account number with us?
Identify the User’s entire response
Save response as
Click on the Pen icon and name it VarCustomerID
choose Add Node
Choose Ask a Question
In Question, define:
What Product No. are you looking to purchase?
Identify the User’s entire response
Save response as
Click on the Pen icon and name it as VarItemNo
Choose Add Node
Choose Ask a Question
In Question, define:
Can you tell us which Quantity you would like to order?
Identify Number
Save response as
Click on the Pen icon and name it as VarItemNo
And now we have our questions and variables. What we have to do from here is to add a new action in our PVA, but this time is going to be active for triggering Power Automate.
To do this, you will have to:
Navigate to Add node in a Topic editor in Power Virtual Agent
Choose to Call an action
Choose to Create a flow
And from here, you will be redirected to the Power Automate editor, and you should start creating a new Power Automate.
You will see immediately that you already have trigger and Output predefined for PVA. Just keep it, and we will use it in the process.
From here, you will have to create some Variables and, most important Sales Order Header and Line.
As you probably know, in BC, Sales order contains two tables:
Sales Order Header
Sales Order Line
We will have to use both. First, we will create Header, and later we will use the Find Record action to find our Item, and then, in the end, we will fulfill Sales Order Line.
Don’t worry. I will now list all actions one by one and in the order in which you will have to create them so that you’re Power Automate works at the end.
Before you start with Sales Order Header and Lines, as I sed, you will need to do some setup in Trigger and initialize some variables.
For the trigger, what you would need to do is to add you’re Inputs. You will probably understand now whose inputs are values we will get from Questions we have asked users in our PVA.
So let’s create three inputs:
Text:CompanyName
Text:Item
Number:Quantity
And after inputs, I will list all variables you have to Initialize, and all of them will be STRING. Just create them, don’t assign any values. We will do that later in the Power Automate.
Order ID
Currency Code
Item No
Quantity
UOM
Total Price
Now that we have created Variables, we can continue creating records in BC. For better understanding, our Variables are here so that we can collect output at the end and show Sales Order info in PVA so that users can understand what they have created and get some information about orders they had made automatically.
If you want to create Sales Order and not use data back in PVA, you don’t need all these Variables. But when making PVA, it is always lovely to show values at the end to users of PVA.
Now let’s continue with Power Automate, and finally, let’s create a record in BC.
We will now perform three actions; you must do this in this order.
Create Record V3 (Business Central)
Environment Name: SANDBOX (if you are working with a PRODUCTION environment, choose PRODUCTION)
Company Name: CRONUS USA, Inc.
API Category: v2.0
Table name: salesOrders
customerNumber: CompanyName (from trigger)
Find Records V3 (Business Central)
Environment Name: SANDBOX (if you are working with a PRODUCTION environment, choose PRODUCTION)
Company Name: CRONUS USA, Inc.
API Category: v2.0
Table name: items
Filter Query: number eq ‘ItemNo’ (ItemNo Variable form dynamic value)
Create Record V3 (Business Central) (Apply to Each will be created automatically)
Environment Name: SANDBOX (if you are working with a PRODUCTION environment, choose PRODUCTION)
Company Name: CRONUS USA, Inc.
API Category: v2.0
Table name: salesOrderLines
documentId: id (from Create Record (Header) dynamics value)
itemId: id (from Find Records (Item) dynamics value)
quantity: Quantity (from the trigger, dynamics value)
And now, after we have created Sales Order in BC, we need to get data and show them back in PVA so that users can see what they have done.
We will do this by assigning values to our Variables. For this scenario, it is best to use Append to string variable action.
Again let’s see what we have to do here.
Append to a string variable (in Apply to Each)
Name: ItemNo
Value: description (from Create Record line)
Append to a string variable (in Apply to Each)
Name: Quantity
Value: Quantity (from Create Record line)
Append to a string variable (in Apply to Each)
Name: UOM
Value: UniteOfMesureCode (from Create Record Line)
Append to a string variable (in Apply to Each)
Name: Order ID
Value: number (from Create Record Header)
Append to a string variable (in Apply to Each)
Name: Total Price
Value: amountIncludingTax (from Create Record Line)
Append to a string variable (in Apply to Each)
Name: Currency Code
Value: currencyCode (from Create Record Line)
When we have assigned values to Variables, we are only left with a few steps till the end of this scenario.
Now we must create one more Variable and append value to it.
This time we are doing this to format our Output result in the best possible way because formatting output values from Power Automate in the PVA is not the best, so we want now to do it in Power Automate and later show this value in our PVA.
To do this, we will create the following Variable:
Initialize variable (Out of Apply to Each)
Name: Order
Type: String
Value: (none)
Append variable
Name: Order
Value: You have created a sales Order with ID: Order ID (Variable dynamics value)
With total price: Total Price (Variable dynamics value) Currency Code (Variable dynamics value)
And now, we are just two more steps to the end in Power Automate.
This time we must use two actions and keep in mind that one of them is already there, so in reality, we must create one more cation (COMPOSE) and, in the end, assign that value to our PVA output.
Compose
Inputs: Order (Variable dynamics value)
Return value(s) to Power Virtual Agents
Inputs
Text: Item
Outputs
And now we are finished with Power Automate. All that is left here is to Save it, jump back to PVA, and map Variables in PVA so that our inputs in Power Automate can work. Your Power Automate would look like the one on the Screenshot if you created it with the exact steps I described.
To do this, you will have to go back to your PVA and inaction, which you have called Power Automate. You have to choose one which we have created just now.
Choose Power Automate, Which you have created
Setup Variables
CompanyName (text) -> VarCustomerId
Item -> VarItemNo
Quantity -> VarQuantity
Add Node
Show a message
Dear customer VarCustomerID (add a variable from the list),
Your order has been created with the following details:
Item(variable from the list)
Now you can Save your PVA and Test it to see if it works. If everything is fine, the result will look something like this.
This is not the end. You can continue playing with this PVA and add one new branch where you will create one more Power Automate for users who are not Customers in BC and first create them so that they can make an order. But this is the end for this scenario, How to create a Sales Order from PVA in BC.
In conclusion, when we can use Power Automate with some other tool natively, SKY IS THE LIMIT in what we can do.
I know that this scenario has a bigger number of steps, but in total, it is not so complicated. Still, it gives an excellent perspective on what you can do and gives you an idea of what some other Power Automates should look like if you are using them from PVA. Enjoy creating this Power automate and Power Virtual Agent.
We are close to the end of this, and we mostly have important conference dates for the following year. I would like to have all Dynamics 365 (and/or Power Platform) conferences in one place, with all dates planned for 2023. So, you can find them here and start planning your attendance as most of them have early bird:
Recently I finished my session about using Dynamics 365 Sales professional with Business Central at Directions EMEA. But there were many questions about D365 Sales Professional capabilities… what is possible, where are limitations…
First, Sales Professional is a CRM solution for SMB companies targeting businesses with more straightforward sales needs with basic sales force automation and limited customizations. But it is still a powerful tool, and I wanted to show you what this app includes using an infographic model. You can see details here:
What more is essential to know? You cannot mix a Sales Professional license with Sales Enterprise (and other Sales licenses)… if you decide to use Sales Professional, you must use it for all Sales users. But if this is not enough for you (at some moment, your company has grown), you can upgrade this license to Dynamics 365 Sales Enterprise.
If you like this infographic, I’ll add a similar one for Sales Enterprise.
You already know Microsoft publishes new releases two times per year (wave 1 in April and wave 2 in October). You can find all news in Microsoft’s release plans. There is also an amazing ecosystem map by Vadim Korepin about all solutions in Dynamics 365 family.
But as I’m most connected with SMB solutions inside Dynamics 365 and Power Platform, I wanted to share more details on what is available for SMB users and companies from Microsoft Dynamics 365 family. Three business applications (Dynamics 365 Business Central, Sales Professional, Customer Service Professional) covered ERP and CRM parts but with plenty of features. I’m sure no other vendor currently can offer more for SMB customers worldwide.
You can look at and download the Ecosystem map for Dynamics 365 SMB solutions I created (resolution is 3840×2160):
I hope this SMB ecosystem map will be helpful for you, and we will have more features and maybe even more solutions here in the future.
I know it has passed since I wrote the first part of this topic, ‘Where is a limit in Business Central CRM capability and when integrating it with D365 Sales (part 1),’ and people expect the second part. But as I’ll speak about this topic on Directions EMEA this year, I decided to postpone the following parts after this event. I would like to keep it interesting and show many of these topics in my session. Of course, as I cannot go so deep into details in 45 minutes, I’ll continue here with publishing my point of view related to this topic.
We know that Microsoft Dynamics 365 Business Central (previously NAV) is primarily an ERP solution. But even so, this product has some customer relationship management capabilities. And name ‘Business Central’ probably comes because this solution can provide all business activities in one solution. But as this is primarily an ERP solution, the biggest strength comes in ERP, and in other areas, such as CRM or HRM, the level of functionalities is significantly lower. But let us make an overview of what is already in Business Central, but we can say it can be treated as CRM.
First, what we can find are a good customer and contact management. Still, as customers play an essential role in every ERP solution, we can emphasize more about contact management where we have some basic information about contacts and some segmentation.
You can also find some level of creating and tracking opportunities and sales quotes and interactions. You can also have some possibilities to make direct phone calls from BC or send an email. This is more or less what we have, but this is not a small number of functionalities.
Today I’ll not go into details about all these features. I just wanted to show some basic information about them and explain on a high level in which situation you should think about an additional and full CRM solution. As a full and independent CRM solution, I’ll focus on Dynamics 365 Sales Professional:
First, naturally, if you don’t have enough functionalities, you will take a specialized CRM solution, but let’s talk in detail on another occasion.
Second, the price can be an issue. If you have pure CRM users, they still need to pay $70 or even $100 for the license as they must pay a BC license even if they need only CRM capabilities. Sales Professional full license price is $65, and you can get full CRM. But with the new attach license for Dynamics 365 Sales Professional, BC clients can add a full CRM solution for an additional only $20.
Third, as I mentioned in the beginning, Business Central is still primarily an ERP solution, meaning its UI is built for ERP and not for CRM. Even if you have many CRM features, when we compare usage of these features, this is definitely not even close to being useable as in a regular CRM solution.
Dynamics 365 Sales Lead to Opportunity Business Proces Flow
Today I wanted just to make a high-level overview, but in future texts, I’ll try to be more accurate about when CRM in Business Central is enough for you and when you should think about integration with Dynamics 365 Sales.
I haven’t written s single blog post for some time and I definitely decided it will be my the last one. I’ve been writing on this blog for 8 years, but I started with another domain even a couple years earlier. In this period I’ve got some really valuable feedbacks with the huge impact on me and I want to thank all of you who read these articles or eventually post some comment/question.
I’ve made this decision as I joined Business Central product group as a Program Manager and when I have something to announce or say, it will be done through Microsoft official channels. I don’t want to bring anyone into an awkward situation by misinterpreting in some situations. Of course I’ll continue to use LinkedIn and Twitter for communication, but I’ll not continue with blogging.
But just to know, this blog will stay active minimum from two reasons:
There are still a lot of valuable information not related with specific version
And my son will continue to use this blog (he has already proved in a Dynamics business)
That means when you find new articles in the future, they will be written by my son Marko Totovic. I think it will be even more interesting in the future as he will bring some new topics and applications from Dynamics & Power Platform family. And just to know some of existing articles already has been written by him.
I think you we hear from me soon but using different types of communication. Meanwhile, give the opportunity to my son to show what he has to give you. totovic.com will continue in a new suit.
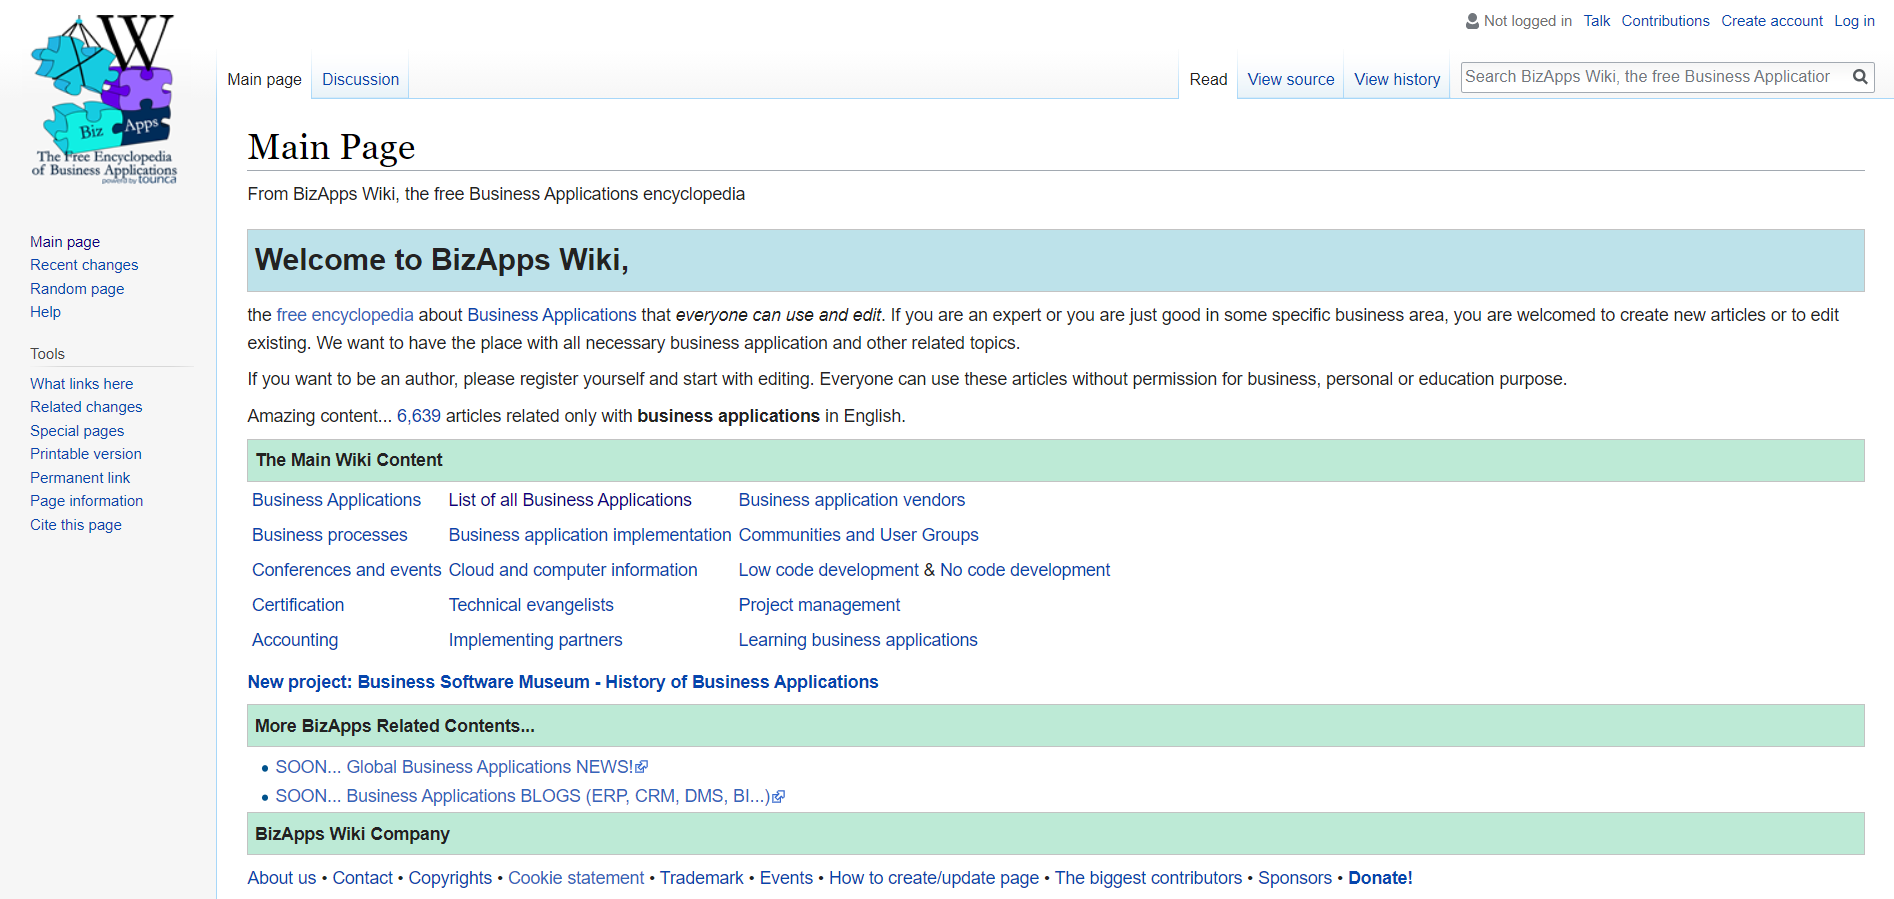
New platform BizApps.Wiki has just started. On the first sight it looks like as well know Wikipedia, but there is ‘but’…
In comparison with Wikipedia there is highly focused content only with business applications (solutions/software) and other related topics. By the business application topics you can find information about almost all possible business application solutions as well as vendors (global and local). Also you can find information about partners or about the most impactful experts (MVPs or similar).
OK it is obviously that topics are not related only with Dynamics solutions as this is Wiki about all business solutions, but there are for sure a few dozens of articles (maybe even more) related only with Microsoft solutions.
And on the end, there is one really good idea about building the digital business applications museum. Even if its history is not so big, it is very interesting how these applications looked like 20-30 years ago. And this is not finished project… as you can see on the first page, this is an ongoing project (always work-in-progress) where it is expected that community will take a part in building or editing this library of articles.
I’ll not write about the project in more details as you can easily go there and check. Definitely good for developers, consultants, project managers, but also for future experts such as students…
I wanted to write this article as I recently passed this exam and I wrote about how to prepare yourself. I already mentioned in this article that if you have an experience in BC or NAV, you generally don’t need to prepare for this exam (but it implies you know and understand BC on the cloud). Now I’m not planning to continue in this direction how to prepare for the exam, but I want to discuss about what we can expect as result of passing this exam.
Generally the most of questions as well as case of study will show your real knowledge, but to be honest you can learn it even if you are not experienced and it cannot prove some specific level of knowledge. Of course, there are some questions non related with real implementation process and as a person with 15+ years in implementation I don’t know why someone thins it is important to know some report by heart, but there is not so many such a questions.
What is more important by my opinion is related with this that I personally am not a fan of this new exam models where we have one exam from whole solution. OK, for F&O we have 4 functional exams and there are similar situation with CRM exams, but there much more topics there and personally I think we have a small number of exams even in F&O and CRM areas. But when we talk about BC, I really cannot believe that one who will pass just one common exam can prove some serious knowledge. Generally BC is implemented very often as a big project and you cannot expect universal consultant who can implement all areas.
Based on my experience, we need to have minimum three exams: one core (we can use MB-800 for this) and another for essential features and third one for premium features (+WMS). And OK, we need development exam. In this case if these exams are prepared on the level as this one, they can prove serial knowledge.
Just to clarify, I like this exam, especially as it comes after a couple of years with no certification for NAV and BC. This is really well done job, but I think partners will need more. Currently, when you see that someone passed MB-800, it can guarantee that this person have basic understanding and knowledge of Business Central. It can be a case that this person is an expert, but this is definitely not necessary to pass this exam.
But as my conclusion, I would like to encourage all BC consultants (and developers as well) to try to pass this exam. Generally I think it is a good idea and especially I would like to recommend passing this exam for junior consultants. Preparing for this exam, they can learn something new and consolidate knowledge. Start with Learning Paths as now we have a lot of really good materials there.
Disclaimer: Everything I wrote in this article is my personal point of view and based on my personal experience and opinion. It doesn’t represent any official opinion companies I’m connected with.