It really sounds amazing. But if you were been at Microsoft Ignite and attended NAV/D365FOBE sessions, you already seen this service as something what we will have in the future. When I say future, I think on the future NAV version, but if we speak about D365 for Financials, you can test in now.
Now, just small introduction how it works. I’ll show this feature on Items and you will see it works fine. When you run Item Card page, you will see Analyze Picture on a Actions tab as on the following picture.
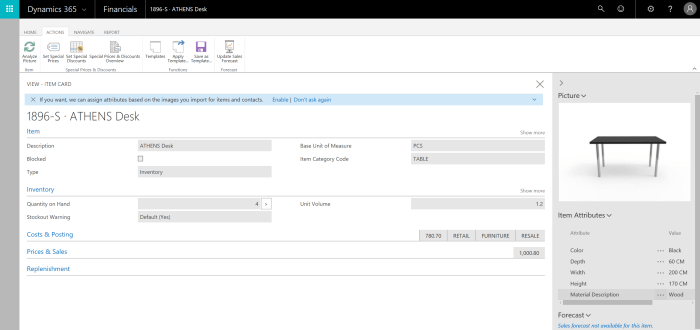
When you start this action for the first time, you will get similar notifications as on the following screen and you just need to enable it (of course) if you want to use:

Then, system will lead through enabling wizard. First you will see a small description about how system uses the Computer Vision API from Microsoft Cognitive Service, where you can find links with more information bout API and services… You just need to click on Next, then confirm that you understand terms of conditions and on the end – Finish (if you want to analyze this current picture, you need to check one field).

And if you check this checkmark field, system will start with analyzing this picture. This is how it works for the first time. But you can click this Analyze Picture on each Item Card where you already have a picture.
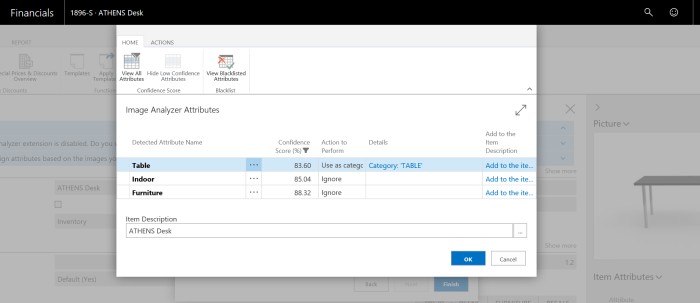
But what if you don’t have picture? As soon as you finish with inserting picture, system will by default run this feature, and system will automatically analyze new picture. When system finish with analyzing of this picture, you will find what system recognize with confidence better then 80%.
But you can find all detected attributes if you click on a View All Attributes. All attributes with not so good confidence will be painted in red.
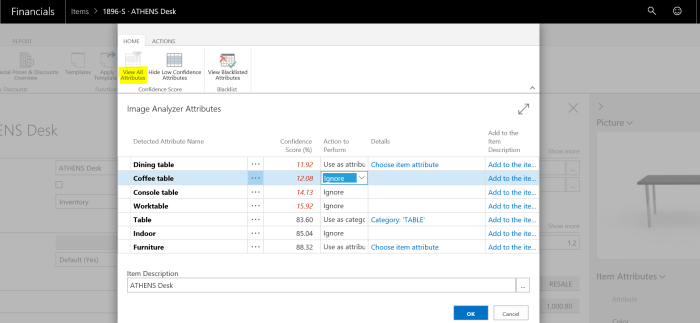
From this point, you can do a few things. First, you will see that system sometimes offer some specific option in Action to Perform. By default, system will mostly offer Ignore as option, but sometimes it is “Use as category” or “Use as attribute”. I think I don’t need to describe what it means :). Of course, you can change this option as you wish and it probably depends of what system recognized. You can also use “Add to the Item Description” for each of attributes and to create specific Item Description based on discovered attributes.
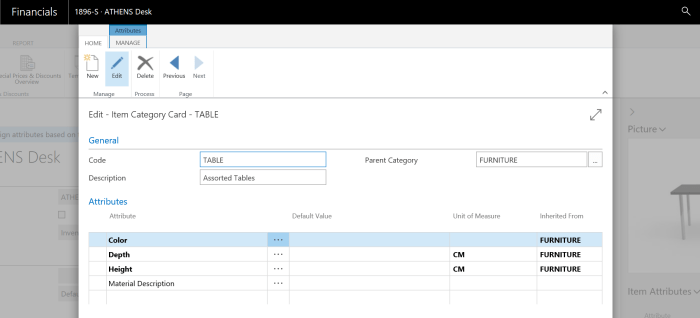
When you finish with everything you can confirm and than you need to finish with attributes. System will add as attributes and as category all attributes you decided.
Now, I’ve showed how you can start with this feature and how to test it. But I wanted to test it little bit more. OK, it worked mostly nice with images we have in Cronus database (not with all, because you need to have clear enough pictures).
But what we will get in some production environment? I made a few tests taking the pictures for the same items from catalogue (ideal pictures) and made from my own (natural pictures). You can find 5 tests in the following charts:


Now, you can compare these results. First, I didn’t expect good results from realistic photos, but I was really surprised. Sometimes, ideal pictures got better percentage on the most important attributes (but not so big difference), but system very often recognized better attributes on realistic photos and that means system can understand context of photos. And I got more attributes from natural photos, but of course I got a more noses in attributes list, and this is something I could expect because in real picture you don’t have only one thing on the photo.
But I can conclude that this feature is really powerful. Of course this is just first edition of this feature and this is not unmistakable tool, but it can be very helpful in the future.


