Contacts in Project Madeira via Outlook Client

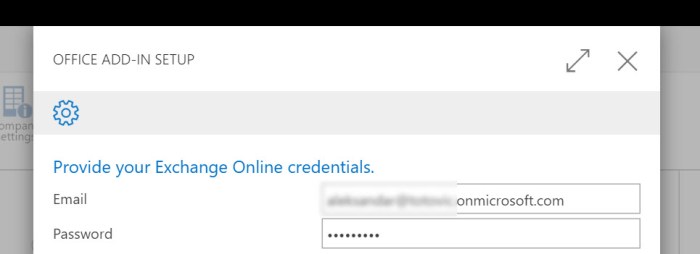
In the last few articles about Project ‘Madeira’, I wanted to show how to configure it and some basics about usage and limitations. Now, I want to show you how we can use Project ‘Madeira’ using our Outlook. First, just to know, to do it we need Exchange Online (I’m using O365).

In this example, I’ve got an e-mail from unknown person. If we use a small icon on the top on e-mail, system will as us what to do with this contact.

MadeiraOut1.jpg

If I choose to add this contact as a contact in my Project ‘Madeira’, I can associate this contact with some of the companies… And everything without leaving my Outlook. If we don’t know how to use some of the fields, we need just to click on this field caption and we will get a small help.

MadeiraOut2.jpg

Now if we want to edit this contact, we can do it using “Edit” button. Or if this is not so comfortable to you, you can choose “Pop Out” button to open this contact in independent window. We also can run some other processes, eg. creating opportunity, creating interaction, checking or creating a quote… or run statistic or send some of the reports (in file format you want).

MadeiraOut3.jpg

If you run e-mail from this person some other time, system will recognize her as a contact. If this contact is not connected with a company, system will offer you this possibility. And everything is a live with your ‘Madeira’ database. You don’t need to leave your Outlook page.

NAV Gallery Image – PS Scripts Order

This week I have training about NAV and Azure and I used some examples in NAV 2016 Gallery Image on Azure.

NAV90GalleryImage.jpg

This image is awesome, but sometime people doesn’t know what PowerShell script can be started before some others. For example, you cannot run “Use Azure SQL Database” and after that “Install Multitenancy”…

Because of that I wanted to make some small help to all people who want to use this NAV 2016 image. In the following, you can find a chart with order of using all PowerShell scripts. Now, you know how to configure all of them on the same VM.

NAV90GalleryImageOrder.jpg

June 2016 CUs for NAV have been released

Today, Microsoft has published new Cumulative Updates:

Generally, NAV 2016 has pretty more Platform Hotfixes than other three versions (they have only few of them). About Application Hotfixes, the last two version have most of all improvement.

Almost all Hotfixes, both Platform and Application are just improving some issues in system. If we wait something new, I think we will wait until new version will be published. In any case, I suggest to install the most recent cumulative update for your NAV version. And still better, upgrade your NAV to the freshest NAV version :). You will not make mistake.

upgrade.png

Project Madeira Universal App

If you want to try Project “Madeira” on your devices (phone or tablet for example), you can download this App from App Store or from Windows Store.

When you run them, you will see that system requires Activation Code. This is not the same as you use App for Dynamics NAV (you don’t need to put it URL). You can find this Activation Code if you open “Get The App and Activation Code” page (you can find it using search pane).

MadeiraAC1.jpg

You need to type this Activation Code in your App.

MadeiraAC2.jpg

After that system will require to confirm your email as account with password and just wait few seconds. After that, everything will be fine. I’ve checked it with Windows Tablet and Windows Phone and with iPhone, as well. It looks fine.

May 2016 Cumulative Updates for NAV 2016, 2015, 2013R2, 2013

Yesterday, Microsoft has been published the newest Cumulative Updates for Microsoft Dynamics NAV 2016, NAV 2013R2 and NAV 2013. Today morning, Microsoft has published Cumulative Update for Microsoft Dynamics NAV 2015 as well.

There are the all Cumulative Updates based on versions:

There are not so many Platform hotfixes and more Application hotfixes for almost all business area. Newer versions as usually have more hotfixes.

MPS.jpg

As usually, these cumulative updates replace previously released cumulative updates.

Posting Groups in Project Madeira

When you create a new company in Project Madeira, you will get the new Chart of Account by default. This Chart of Account is created in this case by US legislation (this version is only for US); I hope it will contain for all countries as we will have localisations.

The same thing is with all posting groups. We have these posting groups already created from the beginning, and we need to use them in data migration process. Of course, if you need more posting groups, you need to add new and setup them as well. By default, we have limited set of posting groups:

  • Customer/Vendor Posting Groups: DOMESTIC
  • Gen. Business Posting Groups: DOMESTIC
  • Get. Product Posting Groups: NO TAX, RETAIL and SERVICES
  • Bank Account Posting Groups: CASH, CHECKING and SAVINGS
  • Inventory Posting Groups: RESALE

And when you open Inventory Posting Setup for your existed group, you will see that we can add GL accounts, but is has not Locations.

MadeiraIPG.jpg

That means we have not locations in the Project “Madeira”. This is not connected only with setup; that also means we cannot use locations in inventory process. You also cannot find fixed assets in Project “Madeira”.

It also means setup is not so hard, but it still requires some specific knowledge about the main thing of system and we cannot expect from client to configure it by himself.

Project Madeira and Power BI

If you have demo Project “Madeira”, you can also try to use Project “Madeira” automated Power BI. You need to use the same credentials and log to powerbi.com

Then, you need to run Services and choose Project “Madeira” package:

PowerBiMadeira1.jpg

Choose “Connect” and put your OData Feed URL. You can find this URL in your Project “Madeira”. You need to find Web Services page using search and copy OData URL until your company name, as the following model:  https://[navserver]/[instance]/OData/Company(‘Sample%20Company’).

Wait some time and type your credentials, using the basic authentication method. You need to use your O365 username, but as your password, you need to use your “Web Service Access Key”. To create your “Web Service Access Key”, go to the your User card in Project “Madeira” and use “Change Web Service Key” command to generate your “Web Service Access Key”.

PowerBiMadeira2.jpg

After that, you need to continue with logging to your PowerBI. You don’t need to take care about certificates and similar; everything is already prepared. When you finish, you will get page similar as my. Then, you can check and try to make it funny…

PowerBiMadeira3.jpg

Pretty easy. Enjoy.

Project Madeira – The Final Configuation

In few previous articles, I’ve already wrote about configuration of our new product “Project Madeira”. Now I want to finish with configuration.

I’ll continue with Office Add-Ins set up. When we start wizard, first we can choose to set up only our mailbox or completely organization. Then, system will ask us to fill our exchange online credentials (email and password). If we choose My organization, then we have to have an administration rights.

Madeira1.jpg

After that, we just need to click on Finish and everything is finished. Then, I’ll continue with setting up approval workflow. After reading of small manual, we can chose to activate Purchase Invoice Approval or Sales Invoice Approval; or both of them. We need to choose approver person and amount limits.

Madeira2.jpg

After that, just click Next > Next and Finish. Very easy (of course, if you know and understand what you actually want to configure and use). And finally, we can configure email logging. We can set up Exchange public folders and rules, so that system processes incoming and outgoing emails to create Interactions. Just fill your Exchange Online administrator credentials. After we finished with this, system will create a few public folders:

Madeira3.jpg

After that, system will ask to create and activate incoming and outgoing email rules.

Nothing else. Your “Project Madeira” is configured. Of course, we can do some additional work, but about this in some other articles.

Project Madeira – Tax and Email Setup

OK, in previous mails, we’ve already made the basic configuration and data migration, but now we need to continue with “Madeira” setup. The next step is Sales Tax Setup.

When we start wizard, the tax group of TAXABLE is created. Then, we need to add sales and purchase tax accounts:

ProMad11.jpg

After that, we need to set up city tax rate, county tax rate and state tax rate. And, finally we need to choose for whom we want to add these tax areas.

You can notice, I speak only about taxes and not about VAT. This is because this “Preview” is only for US area.

After we configure taxes, we will continue with email configuration. We can choose between O365 or some other providers. If we choose O365 option, we just need to fill our User ID and password. But if we choose other, we need to fill more details: Authentication, SMTP Server and SMTP Port and of course, our credentials:

ProdMadeira12.jpg

After we configured this, we can send test email from the wizard. And this will be all about configuration of tax and email. Very easy, right?

Project Madeira – Data Migration

As you already used wizard to make some primary configuration, you can continue with using of few another wizards to finish complete setup of your company. You can find a small Assisted Setup to see what you need to finish.

ProMadS1.jpg

When you open a Migrate Business Data, you will continue with the wizard. And first, you can see what extensions you already have. Yes, you hear fine; you can use different extensions as apps. By default, you have three of them: Envestnet Yodlee Bank Feeds, PayPal Payments Standard and QuickBooks Data Migration (just click on Open Extension Management and you will see). It looks fine:

ProMadS2.jpg

Then, you can choose to import from Excel or from QuickBooks (because you have an extension). Than, you can download all templates and fill them. When you fill them, you need to configure Settings to set default templates and import this Excel file after that.

ProMadS3.jpg

You will see the numbers of your main data (Customers, Vendors and Items) and if this is correct, just apply them. If you have errors, you can see them with all details. On the end, you need to finish process and import is completed.

It is easy, but I think it will not be possible to be finished without some support from partners. Client without standard NAV knowledge will not be in situation to import and configure everything they need. This is still job for partners.